When it comes to plumbing, knowing how to solder copper pipes is an essential skill for professionals in the field. Not only does soldering ensure secure and leak-free connections, but it also allows for the efficient flow of water through the pipes. Plus, it’s a cost-effective and durable method that has been used for decades.
Soldering copper pipes involves joining two pieces of copper pipe together using solder and a heat source, such as a torch. This technique creates a strong bond between the pipes, preventing any water leakage. In fact, soldered copper pipe connections have been found to be up to 95% leak-free, making them a reliable choice for plumbing systems. By learning how to solder copper pipes correctly, plumbers can ensure the long-lasting performance of their work and provide reliable plumbing solutions for their clients.
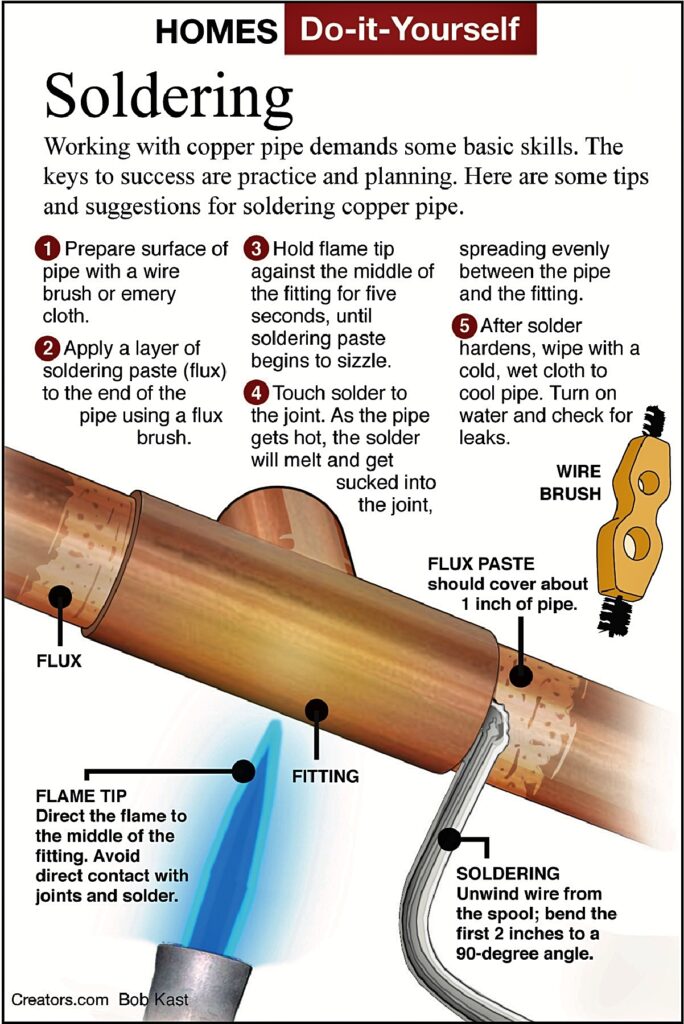
When it comes to soldering copper pipes in plumbing projects, follow these steps for a successful connection:
- Cut the pipes to the desired length.
- Deburr the edges of the pipes with a deburring tool.
- Apply flux to the outside of the pipe and inside of the fitting.
- Fit the pipes together and hold them in place with a clamp or vise.
- Heat the joint evenly with a propane torch until the flux starts to bubble.
- Touch the solder to the joint, and when it melts, apply it around the entire joint.
- Let the joint cool, and then wipe away any excess flux or solder.
By following these steps, you’ll be able to solder your copper pipes like a professional plumber.

